SQL Server database migration - The Backup & Restore method


Published:
Browse All Articles > SQL Server database migration - The Backup & Restore method
In this article I will describe the Backup & Restore method as one possible migration process and I will add the extra tasks needed for an upgrade when and where is applied so it will cover all.
Migrating a database is moving it to another instance, within the same server or to another server. Many of the database migrations also includes an upgrade, meaning that the database will be moved to a more recent version of the database engine.
The Backup & Restore method can be used to reduce the downtime period during the database migration process by performing a full backup and restore it in the new MSSQL instance while the users are still logged in and working so the downtime can be shorter by applying a differential or transaction log backup (depending on the database recovery model) after all users being disconnected and the database does not have any activity, meaning that downtime is limited to the time of the differential/transaction log backup, copy and restore tasks.
NOTES:
- This migration method is for user databases only. System databases, Jobs, DTSX Packages, Reports and any other database object are not covered in this article.
- A sysadmin role is necessary to execute any of the provided steps.
Before start - Only for Upgrades
In the case of a migration being part of an upgrade then the first pre requisite is to run the SQL Server Upgrade Advisor to analyze the earlier version of the SQL Server database, and then generates a report that identifies issues to fix either before or after the upgrade. Those issues are not covered by this article either.
Step 0 - Preparation
The database files on the destination server will be the same size as the database files on the source server, so for larger files you can shrink them before performing the database full backup so smaller files will be created during the restore on the destination server. For data files use shrink with truncate only option so will only release all free space at the end of the file to the operating system but does not perform any page movement inside the file. It will be faster and will not cause fragmentations.
Step 1
Run a full backup on the source database by using the interface provided by SSMS (right-click on the database name, chose Tasks/Backup...:
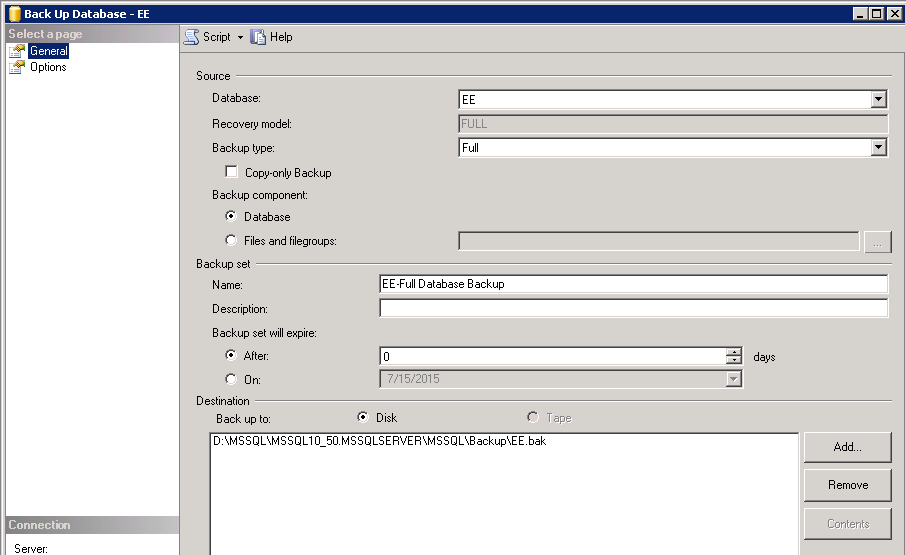
The same operation can be executed by the following T-SQL commands:
BACKUP DATABASE [EE] TO DISK = N'D:\MSSQL\MSSQL10_50.MSSQLSERVER\MSSQL\Backup\EE.bak' WITH NOFORMAT, INIT, NAME = N'EE-Full Database Backup'
Note: "EE" is the database name used for this example. You need to replace it with your real database name.
Step 2
Copy the the full backup file from the source location backup path to the destination server.
Important: In the case a rollback will be necessary this backup file can be used to perform that task.
Step 3
Connect to the destination server and restore the full database backup made in step 1. Specify the WITH NORECOVERY option if you will apply differential and/or transactional log restores then only the restore of differential or transaction log backup in the destination server will be running the WITH RECOVERY option.
You can restore the database by using the interface provided by SSMS (right-click on the Databases folder and chose Restore Database...) and locate the backup files by clicking the "From device" button. Check the Restore cell and provide a name for the new database. In case of providing an existing name then the database will be overwrited:
 Click on Options to specify the WITH NORECOVERY state if you will apply a differential or transaction log restore after, or if you want to change the data and transaction log files location when the path is different from the source server. In case of restoring into an existing database check the WITH REPLACE restore option:
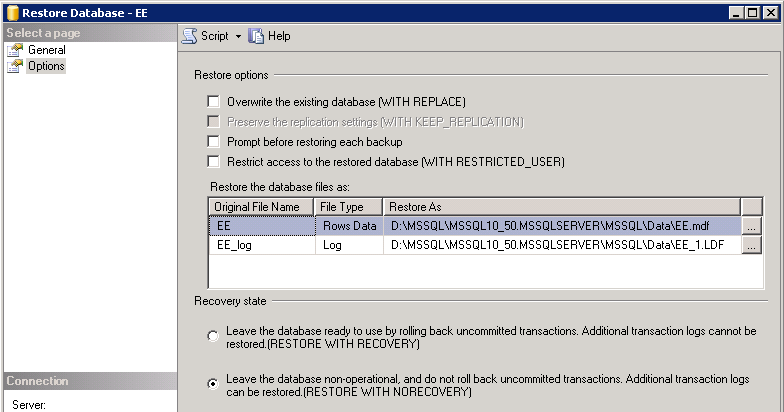
The same operation can be done with the following T-SQL command:
RESTORE DATABASE [EE]
FROM  DISK = N'D:\MSSQL\MSSQL10_50.MSSQLSERVER\MSSQL\Backup\EE.bak'
WITH  FILE = 1,
	MOVE N'EE' TO N'D:\MSSQL\MSSQL10_50.MSSQLSERVER\MSSQL\Data\EE.mdf',
	MOVE N'EE_log' TO N'D:\MSSQL\MSSQL10_50.MSSQLSERVER\MSSQL\Data\EE_1.LDF',
	NORECOVERY,  NOUNLOAD
GO
If the full backup was performed during a period that there was no activity on the database so you ran this step with the Recovery option then you can skip the next step. Otherwise if the NoRecovery option was applied your new database should be in Restoring status:
 Step 4 - Only for minimal downtime
Now that the tasks that took more time were done and all the users has been disconnected and no more activities are running on the database is time to perform a transaction log backup or a differential database backup (depending if the database has respectively Full or Simple recovery model set) so the additional database modifications will be applied and stored in the migrated database.
Run a differential or transactional backup on the source database by using the interface provided by SSMS (right-click on the database name, chose Tasks/Backup... The Backup Type combo box has the available options for the backup types. No more options need to be changed since the Recovery option is the default and it will keep the file locations from the previous restore:
 The same operation can be executed by the following T-SQL commands:
BACKUP LOG [EE] TO DISK = N'D:\MSSQL\MSSQL10_50.MSSQLSERVER\MSSQL\Backup\EE.trn' WITH NOFORMAT, NOINIT, NAME = N'EE-Transaction Log Backup', SKIP, NOREWIND, NOUNLOADCopy the the new backup file from the source location backup path to the destination server.
Important: In the case a rollback will be necessary this backup file and the previous full backup file can be used to perform that task.
Connect to the destination server and restore this backup by applying the WITH RECOVERY option.
You can restore the database by using the interface provided by SSMS (right-click on the new databases folder and chose Restore...) and locate this backup file by clicking the "From device" button:
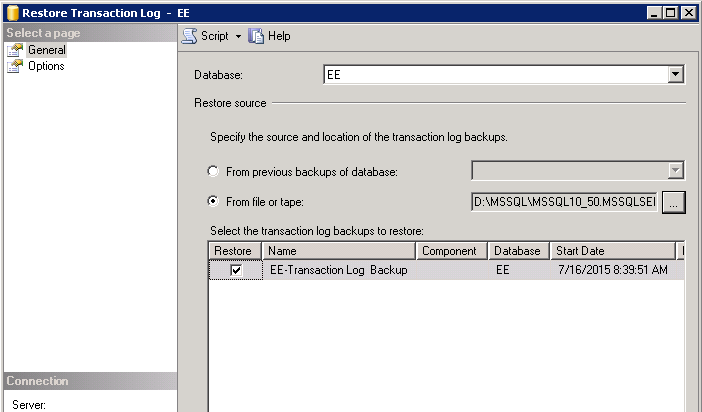 The same operation can be done with the following T-SQL command:
RESTORE LOG [EE] FROM DISK = N'D:\MSSQL\MSSQL10_50.MSSQLSERVER\MSSQL\Backup\EE.trn' WITH FILE = 1, NOUNLOADThe database should be now online and available.
Step 5 - Only for Upgrades
In the case of a migration being part of an upgrade then there is an extra step that is to change the compatibility level of the migrated database so his behaviour will be compatible with the current version of SQL Server.
After that you should rebuild all indexes but if time is an issue then alternatively run DBBC UPDATEUSAGE on the database to correct any incorrect row or page counts and update the statistics for all the tables in the database with the UPDATE STATISTICS command.
Step 6
After database migration you will need to transfer the logins and passwords from the old instance to the new one and map those logins to the database users. Microsoft has a good and complete article about that so I just leave here the link to the article.
After all these steps are done it is highly recommend that you perform a full backup of the migrated database.
Have a question about something in this article? You can receive help directly from the article author. Sign up for a free trial to get started.
Comments (2)
Commented:
Commented: