Import PST to Office 365 – Network Upload Method


With the emergence of Office 365 as a superior email communication platform, many organizations have started switching over to it. After migrating to Office 365, sometimes users, as well as organizations, will have to import PST files to Office 365 for various reasons. There are manual methods as well as professional tools available for importing PST files to Office 365. Here, I will show how you can quickly import PST files to Office 365 without losing data. We have two methods for the same:
- Network Upload Method
- Kernel Import PST to Office 365
Network Upload Method
Network Upload method is a manual way to import PST files to Office 365 mailboxes. You can use this method when you have good technical knowledge. The steps are:
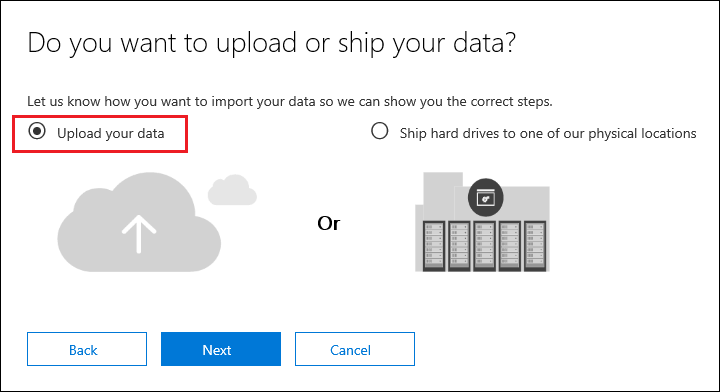
- Download & install AzureAzcopy and copy SAS URL: Initially, you have to download and install the AzureAzcopy tool. For this, you have to log in to your organization’s Office 365 account using administrator credentials. You have to choose either you want to upload your data, or you want to ship it physically.
- Upload PST files to Office 365: Now you can run the AzureAzcopy tool. Make sure that your PST file is located on a file share or file server in your organization.
- Preview your uploaded PST files: This is an optional step. If you are going to view your uploaded PST files, then you have to download and install Microsoft Azure Storage Explorer. Using it, you can preview the PST files.

- Map your PST file to Office 365 mailboxes: Once the PST files are successfully uploaded to the cloud storage, the next thing you have to do is to create CSV file. This CSV (a sample can be downloaded) maps PST files with Office 365 mailboxes.
- Create a job to import PST files: Now create a job that can import PST to Office 365. In this step, you can use the CSV mapping file you have created in the previous step.

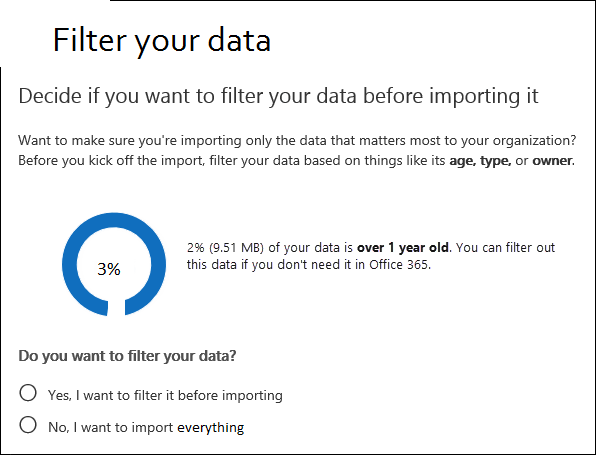
- Set filters and start your import job: Once you have created the job, Office 365 analyzes data and allows to set filters on data before importing it to Office 365. Apply filters as per your need and then start your import job.
Disadvantages of Network Upload Method
The Network Upload method is very complicated, and it requires much technical knowledge. So, it is not reliable for non-technical users. And there are chances of data loss. To overcome all these issues, you should use a third-party tool.
Kernel Import PST to Office 365
Kernel Import PST to Office 365 is designed to import single or multiple PST files to Office 365. You can use either an end user account (for importing to a single/archive mailbox) or an Office 365 account (for importing to multiple mailboxes under this account).
- Efficiently imports healthy PST/OST files to cloud platform of Office 365.
- Allows to map PST files with Office 365 mailboxes - manually or using CSV.
- Enabled with inbuilt filters to segregate data before migration.
- Option to save PST mailbox hierarchy to a separate folder in Office 365 mailbox.
- Allows using CSV file to import PST files to multiple Office 365 mailboxes.
- Provides a summary of import process (can be saved in CSV file).
Import PST to Office 365 using Kernel Import PST to Office 365
Kernel Import PST to Office 365 is an easy to use the tool. To import PST files to Office 365, you can follow the steps:
- Launch the Kernel Import PST to Office 365 tool

- Add PST file as the source: The tool allows you add one or more PST file as the source. You can click the Add button and select the PST files from any location. If needed, you can also select OST files also as the source.
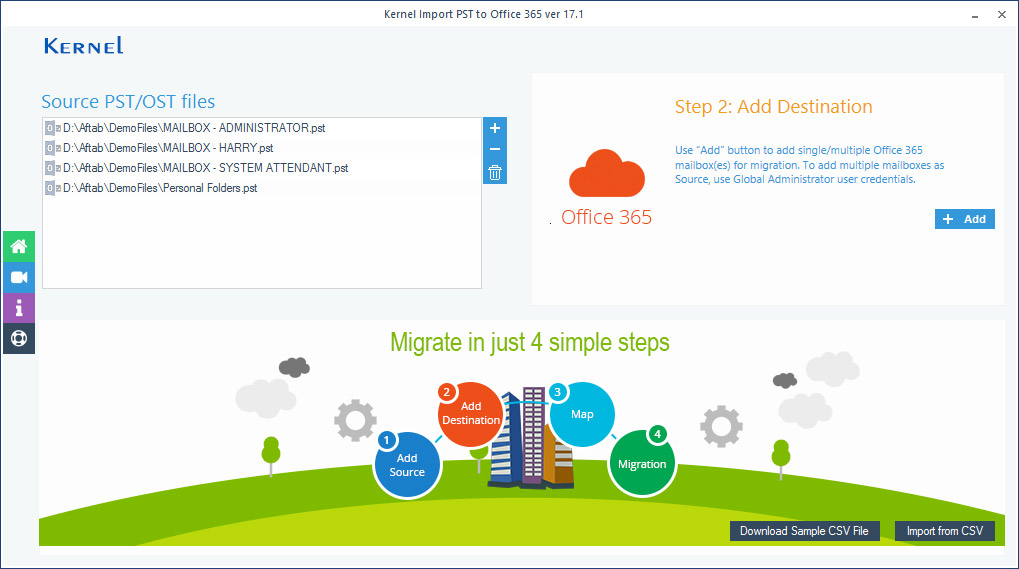
- Add Office 365 account as the destination: Now you can add an Office 365 account (user account or admin account) as the destination. Here, you have the option to migrate Single/Archive mailboxes or migrate multiple mailboxes in a single attempt. And with Office 365 global admin account, you can view the list of all the mailboxes under this account. You can also map PST files with corresponding Office 365 mailboxes as per your requirement.
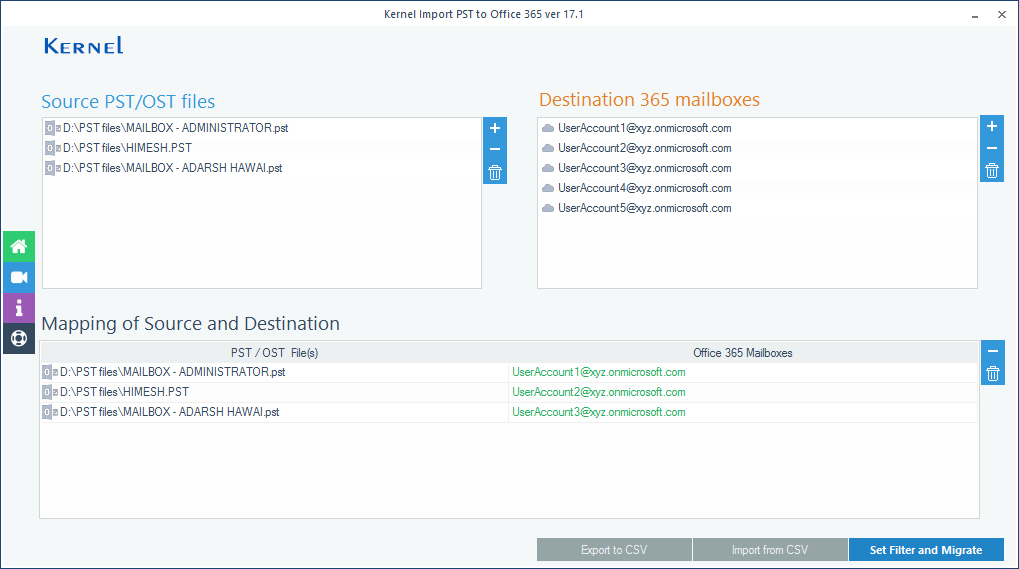
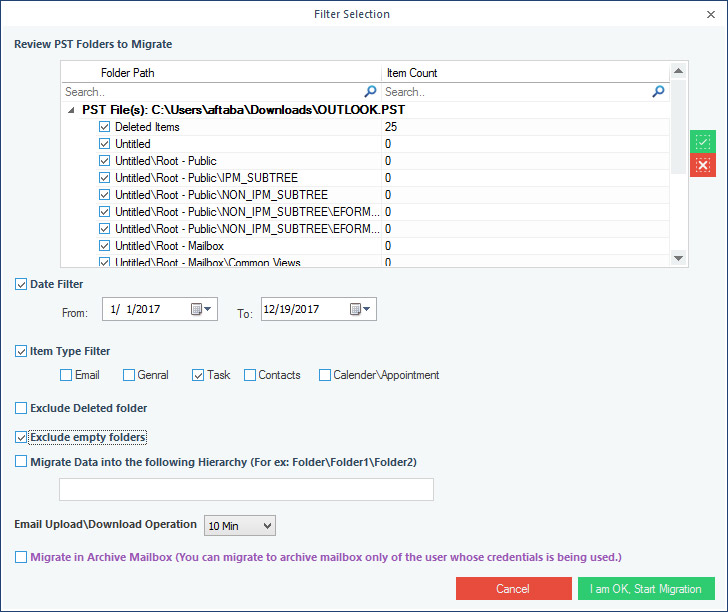
- Apply filters and start migration: In this step, you are allowed to perform the selective migration. You can apply filters to your PST data before migration. You can also exclude empty and Deleted folder from migration. Once you have applied filters, then you can start migration.
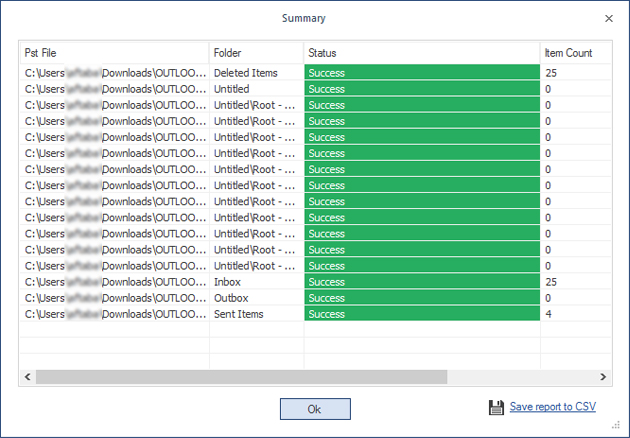
- Save the PST import report: Once the PST import process is complete, the software displays the summary of the entire process. You my save this report to a CSV file.
Network Upload Method Vs. Kernel Import PST to Office 365 tool
| Network Upload Method |
Kernel Import PST to Office 365 Tool |
| Lengthy and complicated procedure. |
Simple procedure – only 4 steps |
| Imports only PST files |
Imports PST & OST files |
| Need to download and install AzureAzcopy tool and copy SAS URL |
Does not require any other tool. |
| Filters PST data by age, type, and owner. |
Filters mailboxes by Date Range, Item Type, Folders. Can exclude empty folders & Deleted folder. |
| CSV based mapping only |
Allows manual and CSV based mapping |
Related Video:
Have a question about something in this article? You can receive help directly from the article author. Sign up for a free trial to get started.
Comments (0)